2017年6月22日木曜日

How to update Google spreadsheet from Raspberry Pi using Google API.

僕は、ロボットに関するデータは www.workrobot.co.jpのロボットクラウドを使って処理をしている。

ただ、デバック時のちょっとしたデータ処理は、Raspberry PiからGoogle spreadsheetに登録して、グラフ化などしたくなる。

で、そのメモ(^^)


1.処理内容

Raspberry Piのpythonスクリプトから、共有設定されたspreadsheetにデータを登録・更新・削除などする。今回は、追加(append)処理サンプル。


2. 作業の順番

2.1 Google 側の設定と準備

(1) Google API 有効化

・Google API Consoleでプロジェクト(test)を作成し、Sheets APIを有効化
   ここ!!→ click

   以下、Google API Consoleは、「コンソール」表記
test プロジェクトで有効化します。

(2) 認証情報設定

・有効化した後、認証情報追加画面だけどcancelしてコンソールに戻る
・コンソールで認証情報選択する
・「サービスアカウントキー」を選択する
   Raspberry Piから、処理をしたいのでこの項目を設定

・サービスアカウント名を入力し、役割をprojectの編集者で設定する
   サービスアカウントIDは、次の(3)で入力するので記録する
・作成ボタンを押下すると、Raspberry Pi側に置く認証ファイルのダウンロード処理になる。保存してRaspberry Piに転送する

(3) 処理対象となるspreadsheetを準備・設定
・spreadsheetを作成する。
   本説明では
   spreadsheet名「test01」
   sheet名「data01」

   sheetID「49ga0igsia79w5u4igtaoeay75489hfadha」
   sheetIDは、シートのURLの...../d/から/edit/....の間の文字列
・共有設定をする
   (2)処理のサービスアカウントをユーザー欄に美優力する
   役割は、「project > 編集者」で設定する

以上で、Google APIの設定、情報交換をする際の認証情報設定取得、スプレッドシートの設定が終了。

2.2 Raspberry Piの準備

Raspberry Pi側の準備。
(1) pythonのクライアントモジュールインストール
   python2.7環境

   $ sudo pip install --upgrade google-api-python-client

おしまい(^^)


2.3 スクリプトを動かす

その前に、、、
Google Sheets APIの説明は→click
サンプルプログラムの使い方の詳しい説明→click

スプレッドシートのA1:C1に、データを登録するスクリプトはドーン!

import httplib2
import numpy as np

from apiclient import discovery
from oauth2client.service_account import ServiceAccountCredentials

SCOPES = 'https://www.googleapis.com/auth/spreadsheets'
APPEND_RANGE = 'data01!A1:C1'   ←シート名とセル位置

class GoogleSS(object):
  def __init__(self, sheet_id):
    self.sheetId = sheet_id

    credentials = ServiceAccountCredentials.from_json_keyfile_name('./test-xxjjdfksgj.json', scopes=SCOPES) ←認証用のjsonファイル指定
    http_auth = credentials.authorize(httplib2.Http())
    discoveryUrl = ('https://sheets.googleapis.com/$discovery/rest?''version=v4')
    self.service = discovery.build('sheets', 'v4', http=http_auth, discoveryServiceUrl=discoveryUrl)

  def append(self, values):  ←今回は追加モード
    assert np.array(values).shape==(3,) , "The shape of value %s must be 3" % (np.array(values).shape)

    value_range_body = {'values':[values]}
    result = self.service.spreadsheets().values().append(spreadsheetId=self.sheetId, range=APPEND_RANGE, valueInputOption='USER_ENTERED', body=value_range_body).execute()

if __name__ == '__main__':
  sheet = GoogleSS('49ga0igsia79w5u4igtaoeay75489hfadha') ←sheetID
  sheet.append(["Kayak", "Love", 3]) ←追加するデータ

結果は、、、

ちなみに、3つ書くと、、、(他にもやり方ありますが、、、)
  sheet.append(["Kayak", "Love", 1])
  sheet.append(["PiroettoSS", "perception", 1])
  sheet.append(["Antix", "Jackson", 1])


Peace!!


2017年6月21日水曜日

Recognizing road edge

こんな感じ、、、、


Peace!!


Coexisting python2 and python3 on Anaconda

Macでの開発は、ほとんど、python3 (Anaconda)で開発。

たまに、python2の環境でインストールやupdateの作業を使用する時がある。

で、python2の環境を作って、起動しているshell上だけをpython2にする。

$ which python

$ /Users/xxxxxx/anaconda/bin/python

$ conda create -n py2 python=2.7

$ conda activate py2

$ source activate py2


python2の環境が終われば、terminalをclose

次回からは、source activate py2 だけ(^^)

Peace!

2017年6月19日月曜日

Library setting of Eclipse CDT

マルチプラットフォームで開発しているので、IDEはEclipseを使っている。

言語は、基本はCとC++。従って、CDTを使っている。

僕の場合は、処理速度最優先なので結果的にそうなってしまう。

CDTの設定だけど、Eclipseの手間と感じるのは利用するlibraryの設定

OpenCVの例でメモっておくけど、、、

実は、僕も不勉強で、設定に関しては理解していない事も多かった。

プロジェクトのフォルダーの.cprojectファイルに直接書けばlibraryの設定をUIで一つ一つしなくても良い。

例えば、こんな感じで、全部設定してしまう。例はwindowsの場合

<option id="gnu.cpp.link.option.libs.127616230" name="Libraries (-l)" superClass="gnu.cpp.link.option.libs" useByScannerDiscovery="false" valueType="libs">
  <listOptionValue builtIn="false" value="opencv_core320.dll"/>
  <listOptionValue builtIn="false" value="opencv_features2d320.dll"/>
  <listOptionValue builtIn="false" value="opencv_flann320.dll"/>
  <listOptionValue builtIn="false" value="opencv_highgui320.dll"/>
  <listOptionValue builtIn="false" value="opencv_imgcodecs320.dll"/>
  <listOptionValue builtIn="false" value="opencv_imgproc320.dll"/>
  <listOptionValue builtIn="false" value="opencv_ml320.dll"/>
  <listOptionValue builtIn="false" value="opencv_objdetect320.dll"/>
  <listOptionValue builtIn="false" value="opencv_photo320.dll"/>
  <listOptionValue builtIn="false" value="opencv_shape320.dll"/>
  <listOptionValue builtIn="false" value="opencv_stitching320.dll"/>
  <listOptionValue builtIn="false" value="opencv_superres320.dll"/>
  <listOptionValue builtIn="false" value="opencv_video320.dll"/>
  <listOptionValue builtIn="false" value="opencv_videoio320.dll"/>
  <listOptionValue builtIn="false" value="opencv_videostab320.dll"/>
  <listOptionValue builtIn="false" value="opencv_viz320.dll"/>
</option>

こうすると、、、こんな感じで反映される。


で、あとから不要な物を消してもよいし、、、
こんな感じで、ラクチン

結局、以下の3つを設定する。
1. project > Properties
1.1 C/C++ Build > settings
1.1.1 G++ compiler
        include path
1.1.2 Linker > Libraries
        Libraries (-l)
        Libraries path (-L)
1.2 C/C++ General > Paths and Symbols
        1.1.2の入力が反映されているか確認する。
2. project > Run As
        " Local C/C++ Application "を実行する。エラーになるが気にしない。
        下記のRun Configurations...に、項目として表示させる為。
        もっと良い方法があるはず、、、
3. project > Run Configurations...
        Arguments 設定
        Environment設定
                LD_LIBRARY_PATH shareライブラリーのあるディレクトリ


Peace!!

2017年6月18日日曜日

An Installation of OpenCV3.2 on MacOS 10.12.5

Mac proのOpenCVのupdate

メモですが、、、
30分くらいの処理

~/libにインストールします。

$ cd
$ cd lib
$ git clone https://github.com/Itseez/opencv.git
$ git clone https://github.com/Itseez/opencv_contrib.git
$ cd opencv
$ mkdir build
$ cd build
$ cmake -D WITH_CUDA=OFF -D CMAKE_INSTALL_PREFIX=~/opencv/build -D CMAKE_BUILD_TYPE=RELEASE -D WITH_QT=ON -D BUILD_NEW_PYTHON_SUPPORT=ON -D WITH_OPENGL=OB ..
$ make -j7
$ sudo make install
$ sudo cp lib/pkgconfig/opencv.pc /usr/local/lib/pkgconfig/opencv3.pc

updateの時は以下は必要なし
~/.bash_profile 編集して、保存

$ vi ~/.bash_profile 
    export DYLD_LIBRARY_PATH=$HOME/lib/opencv/build/lib:$DYLD_LIBRARY_PATH
$ source ~/.bash_profile

で、確認

$ g++ `pkg-config opencv3 --cflags --libs` facedetect.cpp -o facedetect

$ facedetect --cascade="haarcascade_frontalface_alt.xml" --nested-cascade="haarcascade_eye_tree_eyeglasses.xml" --scale=0.5 yoda.jpg

ヨーダの顔認識は、、、あれ?

Peace!!


2017年6月16日金曜日

What the hell (-_-;) .... libwebp-6.dll


Windows でのcomputer vision開発は、mingw64+eclipse+OpenCV3.2

気持良く開発しようと思ったら、、、

あれ?

eclipse上で、実行できなくなっている。。。


なぬ???

う、、、

え、、、

、、、

原因わからず、コマンドプロンプトでも、、、

あれ???

え、、、

開発できないのは困るから、、、

あれや、これや、で数時間。

コマンドプロンプトで、直接プログラムを実行する。

お!


libwebp-6.dll  ???

なんじゃこれ?

ネットで検索しても、いまいち不明

で、さらに調べると、Googleのイメージ表示のモジュール

それが無くなっている

ダウンロードのしようもなく、

再インストールだとか、、、

おっ!

libwebp-7.dll はある!

もう、、、(-_-;)

コピーして

libwebp-6.dll

と、名前変えて c:/msys2/mingw64/bin にどひゃーん

めでたし、めでたし、、、

失った時間、4時間 

原因は、mingw64のアップデートか、、、

再インストールしなくてすんで、、、

Peace!!

しかし、、、(´;ω;`)

2017年6月13日火曜日

Upgrading from wheezy to jessie on Raspberry Pi


遅ればせながら、、、jessieへ

実証ロボットのコントローラのアップデート

手順は

(1) Wheezy のアップデート

$ sudo apt-get update
$ sudo apt-get upgrade
$ sudo apt-get dist-upgrade

(2)apt-getの環境設定ファイルの更新(文字列wheezyをjessieに変更) 

$ sudo vi /etc/apt/sources.list
$ sudo vi /etc/apt/sources.list.d/collabora.list
$ sudo vi /etc/apt/sources.list.d/raspi.list

(3)jessie へ

$sudo apt-get update

   Ign http://raspberrypi.collabora.com jessie InRelease
   Get:1 http://mirrordirector.raspbian.org jessie InRelease [14.9 kB]
   Get:2 http://archive.raspberrypi.org jessie InRelease [22.9 kB]
   Ign http://raspberrypi.collabora.com jessie Release.gpg
   Ign http://raspberrypi.collabora.com jessie Release
   Get:3 http://mirrordirector.raspbian.org jessie/main armhf Packages [9,533 kB]
   Get:4 http://archive.raspberrypi.org jessie/main armhf Packages [163 kB]
   Get:5 http://archive.raspberrypi.org jessie/ui armhf Packages [57.9 kB]
   Err http://raspberrypi.collabora.com jessie/rpi armhf Packages
     404  Not Found
   Ign http://raspberrypi.collabora.com jessie/rpi Translation-en_GB   
   Ign http://raspberrypi.collabora.com jessie/rpi Translation-en
   Get:6 http://mirrordirector.raspbian.org jessie/contrib armhf Packages [43.3 kB]
   Get:7 http://mirrordirector.raspbian.org jessie/non-free armhf Packages [84.2 kB]
   Get:8 http://mirrordirector.raspbian.org jessie/rpi armhf Packages [1,356 B]
   Ign http://archive.raspberrypi.org jessie/main Translation-en_GB
   Ign http://archive.raspberrypi.org jessie/main Translation-en
   Ign http://archive.raspberrypi.org jessie/ui Translation-en_GB
   Ign http://mirrordirector.raspbian.org jessie/contrib Translation-en_GB
   Ign http://archive.raspberrypi.org jessie/ui Translation-en
   Ign http://mirrordirector.raspbian.org jessie/contrib Translation-en
   Ign http://mirrordirector.raspbian.org jessie/main Translation-en_GB
   Ign http://mirrordirector.raspbian.org jessie/main Translation-en
   Ign http://mirrordirector.raspbian.org jessie/non-free Translation-en_GB
   Ign http://mirrordirector.raspbian.org jessie/non-free Translation-en
   Ign http://mirrordirector.raspbian.org jessie/rpi Translation-en_GB
   Ign http://mirrordirector.raspbian.org jessie/rpi Translation-en
   Fetched 9,920 kB in 23s (420 kB/s)
   W: Failed to fetch http://raspberrypi.collabora.com/dists/jessie/rpi/binary-armhf/Packages  404  Not Found

   E: Some index files failed to download. They have been ignored, or old ones used instead.

でエラー
collabora.comを使っていないそうなので、コメントアウト

$ sudo vi /etc/apt/sources.list.d/collabora.list
$ cat /etc/apt/sources.list.d/collabora.list
#deb http://raspberrypi.collabora.com jessie rpi
#deb http://raspberrypi.collabora.com wheezy rpi

修正して、再度
$ sudo apt-get update
$ sudo apt-get upgrade
$ sudo apt-get dist-upgrade

途中で、いろいろ聞いてくるので入力をしながら、、、

(4) reboot

$ sudo reboot

(5) 確認

$ lsb_release -a
   No LSB modules are available.
   Distributor ID: Raspbian
   Description:    Raspbian GNU/Linux 8.0 (jessie)
   Release:        8.0
   Codename:       jessie

(6) 後始末

$ sudo apt-get autoremove
$ sudo apt-get autoclean

Peace!


2017年6月5日月曜日

Installation of lighttpd(1.4.45) on Raspberry Pi

例のごとくメモ、、、
----------------------------------------------
追記2017.12.12

wget https://download.lighttpd.net/lighttpd/releases-1.4.x/lighttpd-1.4.48.tar
----------------------------------------------

でも、メモというよりは、苦闘の記録
(下の方に、1.4.45のインストールフローを書いたよ)

Raspberry Piのapt-getでインストールすると、1.4.35という2年位のバージョンになる。
いろいろ機能改善や、bug fixが行われている1.4.4Xを入れるのが良い。
一時期、lighttpdの開発は止まっていたけど、最近は、lighttpd2の開発も始まったようで、活性化してきた。

以前の投稿で、1.4.43のインストールがあるが、どうもその手順ではいまくいかないので、再度投稿

というか!

どうも、1.4.44 と1.4.45は、既に稼働する環境に対して上書きをするだけのインストーラのようだ、、、、丸々1日つぶした(-_-;)

従って、新規のマシンにインストールする時は、1.4.43をインストールしてから、1.4.45を上書きする。


う、、、記憶があいまい。。。
sudo apt-get install lighttpd
で、1.4.35をインストールした後に、1.4.45を上書きだっかかも、、、
どっちでもできるから、、、


また、1.4.43は、/usr/share/lighttpdにファイルを展開する
1.4.45は、/usr/local/lighttpd

実行モジュールも下記に配置されている。
/usr/local/sbin/lighttpd
従って、/etc/systemd/system/lighttpd.serviceを書き換える必要がある。

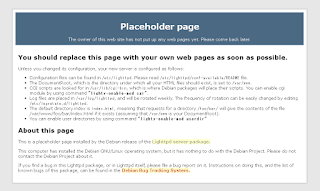
あと、インストール直後に出てくるindex画面(図1)に書いてあることは、systemdを採用する前の事だから、信用してはだめ。。。

lighttpdは、情報が少ないので何とかして欲しいなぁ

次のエラーがでたら、それぞれの処理を行い再度行う。

エラー1:
configure: error: pcre-config not found, install the pcre-devel package or build with --without-pcre

sudo apt-get install libpcre3-dev

エラー2:
configure: error: bzip2-headers and/or libs were not found, install them or build with --without-bzip2

./configure  --without-bzip2

sudo apt-get install libbz2-dev

図1
微妙だけど、、、
Peace!

追加、、、


CGIの起動について

僕の場合は、cgiを動かしたいわけで、、、
昔のlighttpdと違って、/etc/lighttpd/conf-enableにあるシンボリックリンクがmodされる。
そのmodされるタイミングは、もちろんlighttpd.confが読み込まれたとき。
で、それが処理されるのが、最後に書かれている

include_shell "/usr/share/lighttpd/include-conf-enabled.pl"

従って、conf-enableにシンボリックリンクを張っただけではダメ。
このスクリプトが実行されて、conf-enableが展開されて初期化の時に読み込まれる。

で、問題は、素の1.4.45は、include-conf-enabled.pl のスクリプトを置かない。つまり、これがおかれないので、start時点でエラーがでる。無いからしょうがないけど、、、
だから、ということで、これは、Peace!

結局どうする1.4.45

(1)ベースになるモジュールをインストールする(どちらか)
   1.4.43 おすすめ
   sudo apt-get install lighttpd

(2)ベースをupdateする
   1.4.45のbuildとインストール。INSATLLを確認する。
    ./configure
   make
   sudo make install

   1.4.45は、/usr/local/sbin/lighttpdにインストールされる。
    mod 関連のモジュールは、/usr/local/lib
   下記のコマンドで確認してください。
    sudo find / -name mod* -print
   which lighttpd

   以前のものは /usr/share/lib、/usr/share/lighttpdにinstallされている。
   これも、上記のコマンドで確認できます。

(3)環境設定
   /etc/lighttpd.confの内容確認と必要モジュール確認とインストール
   特に、最後のinclude部分の確認

   /etc/lighttpdに3つのperlのスクリプトをコピーしてlighttpd.conf書換
   perlスクリプトは、実行権を忘れずに
   sudo cp *.pl /etc/lighttpd; sudo chmod +x /etc/lighttpd/*.pl

   # default listening port for IPv6 falls back to the IPv4 port
   #include_shell "/etc/lighttpd/use-ipv6.pl " + server.port
   #include_shell "/etc/lighttpd/create-mime.assign.pl"
   include_shell "/etc/lighttpd/include-conf-enabled.pl"

   /etc/lighttpd/conf-*のシンボリックリンク設定
   (例)
   sudo ln -s /etc/lighttpd/conf-available/10-cgi.conf /etc/lighttpd/conf-enabled/10-cgi.conf

   lighttpd.serviceの内容確認と修正、配置位置
   /etc/systemd/system
   /lib/systemd/systemに置く

[Unit]
Description=Lighttpd Daemon
After=network.target

[Service]
Type=simple
ExecStartPre=/usr/local/sbin/lighttpd -t -f /etc/lighttpd/lighttpd.conf
ExecStart=/usr/local/sbin/lighttpd -D -f /etc/lighttpd/lighttpd.conf
Restart=on-failure

[Install]
WantedBy=multi-user.target

(4)確認
   lighttpd -v
   バージョンを確認する

   lighttpd -f /etc/lighttpd/lighttpd.conf -t
   エラーがあればlighttpd.conf修正

(5)実行確認
   sudo systemctl start lighttpd

   最初は、必ず結果を確認する
   sudo systemctl status -l lighttpd
 
   cgiは、10-cgi.confの/cgi-bin/で階層的にサフィックスも含めて確認
   /var/www/cgi-bin以下の実行権は、ちゃんと確認する。

(6)最後に、、、
   sudo systemctl enable lighttpd
   sudo reboot

なんか、やっと(^^)/

Peace!!

sudo cp -r cgi-bin /var/www; sudo chmod -R +x /var/www/cgi-bin

ちなみに、/etc/lighttpd/lightpd.confには、mimeが設定してある。

mimetype.assign = (
  ".pdf"          =>      "application/pdf",
  ".sig"          =>      "application/pgp-signature",
  ".spl"          =>      "application/futuresplash",
  ".class"        =>      "application/octet-stream",
  ".ps"           =>      "application/postscript",
  ".torrent"      =>      "application/x-bittorrent",
  ".dvi"          =>      "application/x-dvi",
  ".gz"           =>      "application/x-gzip",
  ".pac"          =>      "application/x-ns-proxy-autoconfig",
  ".swf"          =>      "application/x-shockwave-flash",
  ".tar.gz"       =>      "application/x-tgz",
  ".tgz"          =>      "application/x-tgz",
  ".tar"          =>      "application/x-tar",
  ".zip"          =>      "application/zip",
  ".mp3"          =>      "audio/mpeg",
  ".m3u"          =>      "audio/x-mpegurl",
  ".wma"          =>      "audio/x-ms-wma",
  ".wax"          =>      "audio/x-ms-wax",
  ".ogg"          =>      "application/ogg",
  ".wav"          =>      "audio/x-wav",
  ".gif"          =>      "image/gif",
  ".jpg"          =>      "image/jpeg",
  ".jpeg"         =>      "image/jpeg",
  ".png"          =>      "image/png",
  ".xbm"          =>      "image/x-xbitmap",
  ".xpm"          =>      "image/x-xpixmap",
  ".xwd"          =>      "image/x-xwindowdump",
  ".css"          =>      "text/css",
  ".html"         =>      "text/html",
  ".htm"          =>      "text/html",
  ".js"           =>      "text/javascript",
  ".asc"          =>      "text/plain",
  ".c"            =>      "text/plain",
  ".cpp"          =>      "text/plain",
  ".log"          =>      "text/plain",
  ".conf"         =>      "text/plain",
  ".text"         =>      "text/plain",
  ".txt"          =>      "text/plain",
  ".dtd"          =>      "text/xml",
  ".xml"          =>      "text/xml",
  ".mpeg"         =>      "video/mpeg",
  ".mpg"          =>      "video/mpeg",
  ".mov"          =>      "video/quicktime",
  ".qt"           =>      "video/quicktime",
  ".avi"          =>      "video/x-msvideo",
  ".asf"          =>      "video/x-ms-asf",
  ".asx"          =>      "video/x-ms-asf",
  ".wmv"          =>      "video/x-ms-wmv",
  ".bz2"          =>      "application/x-bzip",
  ".tbz"          =>      "application/x-bzip-compressed-tar",
  ".tar.bz2"      =>      "application/x-bzip-compressed-tar"
)

2017年6月3日土曜日

Raspberry Pi ロボット開発用OSの選択は?

Raspberry Piには、OSが複数あるわけで、、、

一方、ロボット開発のOSとしては、やはり

シンプル
処理速度
メンテナンス

などの要素から、、、

選択しなければならない訳で、、、

で、最終的には、Raspbianとarchlinuxで、比較をしたけど、、、

結局、処理速度を比べると、

ちょっと信じ難い差が出てしまう。

たとえば、

同じ、プログラム(下記プログラム)で処理時間がこんな感じ。

右が Raspbian、左が archlinux

この傾向は、OpenCVや、他の処理速度テストでも同じ、、、

やっぱり、Raspbianの方が最適化されているという事でしょうか?


#include <stdio.h>
#include <time.h>
#include <math.h>

#define PI 3.141592

int main(void)
{
int i, j;
double len, rad;
clock_t start, end;

start = clock();
for(i = 0; i < 180; i++)
{
rad = (double)i * PI / 180.0;
for(j = 0; j < 10000; j++)
{
double x = len * cos( rad );
double y = len * sin( rad );
}
}
end = clock();
printf("processing time:%d[ms]\n", end-start);

return 0;
}


という事で、Raspbianを選択する事に(^^)

Peace!!